

What's the point of doing it if everybody has one just like yours?
When the iMac arrived on the scene, its translucent plastics and smooth shape were adapted to mice, USB hubs, automobiles and steam irons. Expo-geeks will probably recall those mini iMac clocks and clock radios.

But those things were just pretty toys. Kitsch. Right?
Well, who doesn't like a little kitsch?
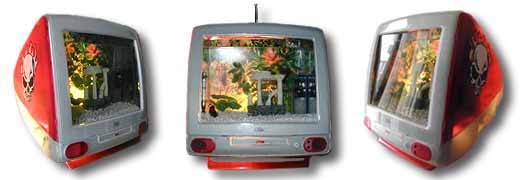
The clock radio iMacquarium
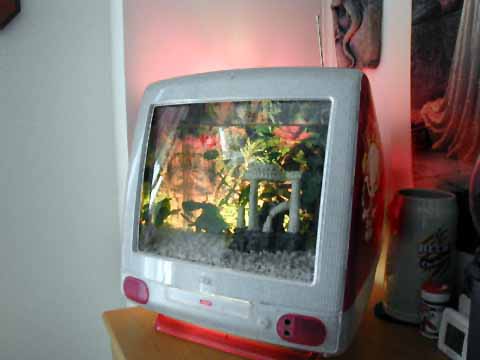
The idea started percolating when I took apart my iMac and saw those little speakers. I knew that I'd have to use them in the iMacquarium in order to make the front grills look right, and since I was keeping them it was only fair to put them to use.
The question was, how far could I take my mod while still keeping the exterior "stock" to the casual eye. I'm pretty satisfied with the results.
 |
The radio is salvaged from a Jensen MCP-150 radio-tape player. [TIP-02] |
 |
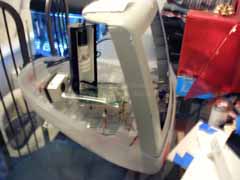 |
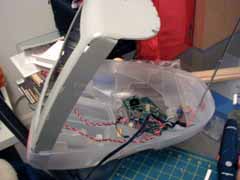
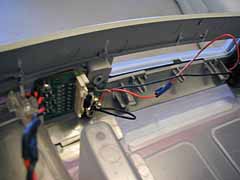
Three legs made from acrylic rods support the radio's circuit board roughly 3-inches above the floor of the case. It is completely covered by a sheet of 1/8-inch acrylic which is sloped to direct any spillage away from the radio and onto the lower vents where it should quickly drain.
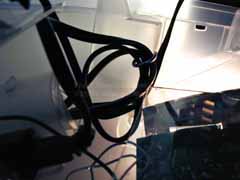 |
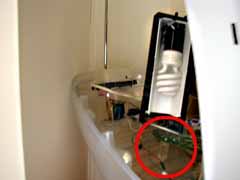
The mount for the power plug was removed from the radio's case and cemented next-to and above the power-hole in the base of the iMac's case. The elevation should prevent it from getting wet even with a big spill from the tank. The cord is drip-looped around a hook, which also serves to anchor it before it leaves the case. |
| The power transformer sits against the back on an elevated stand behind the base of the platform that I used for the airpump. The wrap-around base acts as a splash shield to make sure that it NEVER gets wet. |
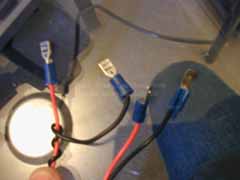 |
The speakers are glued into the front frame and are wired with quick-connects so that the whole thing can be disassembled quickly. |
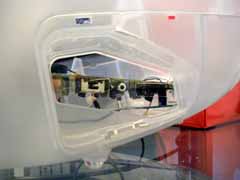 |
The side of the radio is flush against the opening in the right side of the case where the ports used to be. I cut holes in a 1/8-inch sheet of acrylic that was shaped to fill the hole. The power, AM/FM and volume controls are all accessible. |
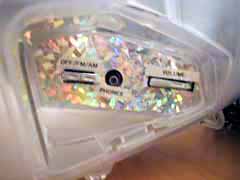 |
The acrylic was covered with a holographic sticker to resemble the original side-piece. I re-used the tabs from the original radio. The labels were made with a Brother P-touch. [TIP-03] |
 |
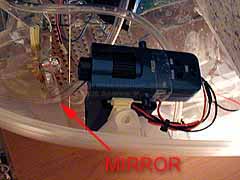 |
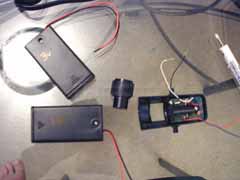
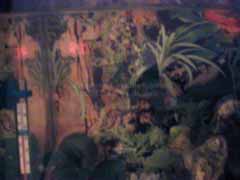
The clock was a very tricky addition to the mod. The best place for an ordinary digital clock would be mounted in the front bezel, but I wanted this iMacquarium to look as much like a stock iMac as possible. The solution that I came up with was an LED projection clock mounted behind the tank. I took the projection unit off of a cheap jWIN alarm clock, rigged it to run off of batteries and mounted it behind the tank with double-sided foam tape. [TIP-04] The image from the clock is projected off of a mirror, which reverses it and reflects it onto the tank's backdrop. [TIP-05]
 |
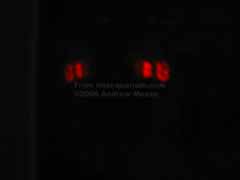 |
It's hard to take a good picture of the clock's display. It looks really cool when it's dark.
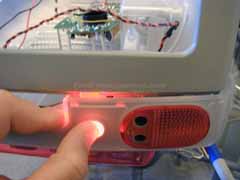
One more thing was missing from my Monster mod. I hate to let a power button go un-modded...
 |
 |
The power button lights up when pressed. It was an easy matter to solder on a new micro power button which was wired to a battery pack that I hid behind the CD ROM door.
 |
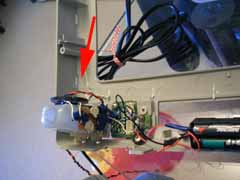 |
The final hardware mod involved the chip and speaker from a "talking" birthday card. Now the iMac laughs when the button is pushed. It turns out to be a great practical joke since EVERYONE pushes the button when they first see the iMacquarium. The red arrow points to where I mounted the card's speaker.

(For those who can't hear it, here's a direct link to the sound: buttonlaugh.wav)
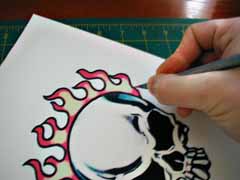 |
The finishing touch was the Monster mod decal. The flaming skull is from an auto-decal that I scanned and printed on Avery label paper. [TIP-06] |
The Monster iMacquarium.